
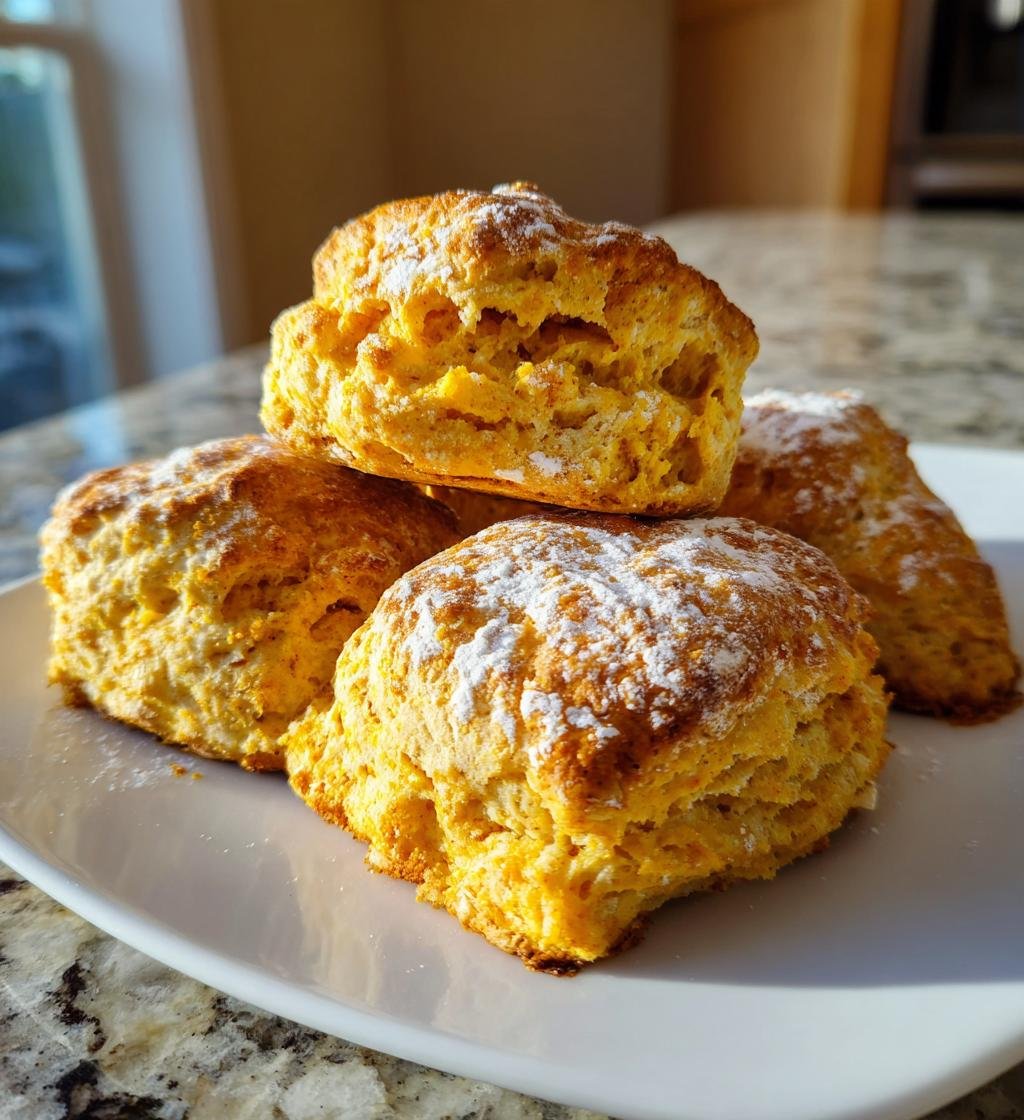
Oh, fall is here, and I couldn’t be more excited! There’s something incredibly comforting about the scent of pumpkin spice wafting through the kitchen. My all-time favorite treat for this season has to be my *Pumpkin Scones October — Classic*. They’re fluffy, mildly sweet, and perfectly spiced, making them the ultimate indulgence for any autumn gathering.
I remember the first time I made these scones for a cozy family brunch. The leaves were just starting to turn, and as I pulled the scones from the oven, the whole house filled with the warm, inviting aroma of cinnamon and nutmeg. Everyone’s eyes lit up, and I knew I had stumbled upon something special! We devoured them while sipping hot apple cider, and it instantly became a cherished autumn tradition.
These scones are not just delicious; they’re so easy to whip up! With just a handful of simple ingredients, you can create a delightful treat that’s perfect for breakfast, an afternoon snack, or even a festive gathering. Trust me, once you try them, you’ll want to make them every October!
Oh, fall is here, and I couldn’t be more excited! There’s something incredibly comforting about the scent of pumpkin spice wafting through the kitchen. My all-time favorite treat for this season has to be my Pumpkin Scones October — Classic. They’re fluffy, mildly sweet, and perfectly spiced, making them the ultimate indulgence for any autumn gathering.
I remember the first time I made these scones for a cozy family brunch. The leaves were just starting to turn, and as I pulled the scones from the oven, the whole house filled with the warm, inviting aroma of cinnamon and nutmeg. Everyone’s eyes lit up, and I knew I had stumbled upon something special! We devoured them while sipping hot apple cider, and it instantly became a cherished autumn tradition.
These scones are not just delicious; they’re so easy to whip up! With just a handful of simple ingredients, you can create a delightful treat that’s perfect for breakfast, an afternoon snack, or even a festive gathering. Trust me, once you try them, you’ll want to make them every October!
Ingredients List
Gather these simple ingredients to make the most delicious *Pumpkin Scones October — Classic*. Each one plays a vital role in creating that perfect fall flavor!
- 2 cups all-purpose flour
- 1/2 cup sugar
- 1 tablespoon baking powder
- 1/2 teaspoon salt
- 1 teaspoon cinnamon
- 1/2 teaspoon nutmeg
- 1/2 cup cold butter, cubed
- 1/2 cup pumpkin puree
- 1/4 cup milk
- 1 egg
- 1 teaspoon vanilla extract
Make sure your butter is nice and cold for that flaky texture we all love in scones. Trust me, it makes a difference! And don’t skimp on the spices; they’re what bring the cozy autumn vibes to every bite!
How to Prepare Pumpkin Scones October — Classic
Now, let’s dive into the step-by-step process of making these delightful pumpkin scones! Don’t worry; I’ll guide you through each part, and soon you’ll have that warm, comforting aroma filling your kitchen!
Preheat the Oven
First things first, preheat your oven to 400°F (200°C). This step is super important because a hot oven helps those scones rise beautifully and gives them that golden-brown finish we all love. So, crank up that heat while you gather your ingredients!
Combine Dry Ingredients
In a large bowl, mix together 2 cups of all-purpose flour, 1/2 cup sugar, 1 tablespoon baking powder, 1/2 teaspoon salt, 1 teaspoon cinnamon, and 1/2 teaspoon nutmeg. Stir them gently so everything is evenly distributed. The spices are what make these scones taste like fall, so don’t rush this part!
Incorporate Cold Butter
Now, let’s add in that 1/2 cup of cold butter, cubed. I like to use a pastry cutter or my trusty fingers to mix it in until the mixture resembles coarse crumbs. You want those little bits of butter to stay cold because they’re going to create those tender, flaky layers in your scones. It’s like magic!
Mix Wet Ingredients
In a separate bowl, combine 1/2 cup of pumpkin puree, 1/4 cup of milk, 1 egg, and 1 teaspoon of vanilla extract. Whisk it all together until smooth. The pumpkin puree adds moisture and flavor, so make sure to incorporate it well!
Combine Wet and Dry Mixtures
Now comes the best part! Gently mix the wet ingredients into the dry ingredients until just combined. You don’t want to overmix—just a few folds until you see no dry flour. A few lumps are totally okay! This will keep your scones light and airy.
Shape the Dough
Turn the dough out onto a floured surface and shape it into a circle about 1-inch thick. Don’t worry about perfection—rustic is the name of the game here! Once it’s shaped, cut it into wedges. I usually get about 8 scones, but feel free to make them larger or smaller if you prefer!
Bake the Scones
Place the scones on a baking sheet lined with parchment paper and pop them into your preheated oven. Bake for 15-20 minutes, or until they’re golden brown and your kitchen smells heavenly. You’ll want to keep an eye on them during the last few minutes—these beauties can go from perfect to overdone pretty quickly!
Once done, let them cool for just a bit before indulging. Trust me, the wait will be worth it!
FAQ Section
Can I use fresh pumpkin instead of canned?
Absolutely! You can use fresh pumpkin to make these scones, and it’s a great option if you have some on hand. Just be sure to prepare it properly first. Start by roasting or steaming your pumpkin until it’s tender, then scoop out the flesh and puree it until smooth. You’ll want to make sure it’s well-drained, so use a fine mesh strainer if it’s too watery. This fresh pumpkin will add a lovely flavor and moisture to your scones!
How do I store leftover pumpkin scones?
To keep those delicious pumpkin scones fresh, store them in an airtight container at room temperature. They should stay good for a couple of days. If you have leftovers after that, I recommend wrapping them individually in plastic wrap and popping them in the fridge to extend their life. Just make sure to let them come to room temperature before serving, or you can warm them up in the oven for a few minutes to bring back that fresh-baked goodness!
Can I add other flavors or ingredients?
Oh, definitely! This recipe is super versatile, and you can get creative! If you want to add a touch of decadence, toss in some chocolate chips or chopped nuts like pecans or walnuts for extra texture. You could also experiment with different spices—like ginger or cloves—to give your scones a unique twist. Dried fruits like cranberries or raisins can also add a nice sweetness! Just remember not to overload the dough; a little goes a long way!
Why You’ll Love This Recipe
- Perfect for Fall: These pumpkin scones capture the essence of autumn with their warm spices and comforting flavors.
- Quick and Easy: With just a few simple steps, you can whip up these delicious treats in about 35 minutes, making them perfect for busy mornings or unexpected guests.
- Versatile Delight: Enjoy them for breakfast, as an afternoon snack with tea, or even as a delightful addition to your holiday brunch spread!
- Customizable: Feel free to mix in your favorite ingredients, like chocolate chips or nuts, to make them uniquely yours!
- Freezes Well: You can easily make a batch ahead of time and freeze them for later, ensuring you always have a delicious treat on hand.
- Family Favorite: These scones are sure to impress friends and family alike. They’ll quickly become a beloved recipe in your home!
Tips for Success
Getting those *Pumpkin Scones October — Classic* just right can be a little tricky, but I’ve got some expert tips to ensure they turn out perfect every time! Trust me, you’ll want to keep these in your back pocket!
Use Cold Ingredients
This is super important! Make sure your butter is cold, straight from the fridge. Cold butter creates those flaky layers we love in scones. And if you can, use cold milk and egg too. It helps keep everything nice and firm while mixing!
Don’t Overmix
When you combine the wet and dry ingredients, be gentle! Overmixing can lead to tough scones, and nobody wants that. Just mix until the ingredients are combined—some lumps are totally fine! Think of it like a gentle hug for your dough.
Shape with Love
When you turn out the dough onto your floured surface, don’t stress about making it perfect. Keep it rustic! A simple round shape will do just fine. The key is to handle the dough as little as possible to maintain those tender crumbs.
Watch the Baking Time
Every oven is a little different, so keep an eye on your scones as they bake. They can go from golden brown to overdone in a flash! I usually start checking at the 15-minute mark. You want them golden and slightly firm to the touch.
Serve Warm
For the best experience, serve your scones warm from the oven. If you let them cool completely, just pop them in the oven for a few minutes to revive that fresh-baked goodness. A little spread of butter or a drizzle of maple syrup on top makes them even more irresistible!
Experiment and Have Fun!
Don’t be afraid to play around with the recipe. Try adding different spices or mix-ins to find your favorite combination. Baking is all about having fun and making it your own, so get creative!
Nutritional Information Section
Here’s what you need to know about the nutritional content of these delightful *Pumpkin Scones October — Classic*. Each scone is packed with flavor but still reasonable for a treat!
- Serving Size: 1 scone
- Calories: 180
- Sugar: 8g
- Sodium: 200mg
- Fat: 8g
- Saturated Fat: 5g
- Unsaturated Fat: 2g
- Trans Fat: 0g
- Carbohydrates: 24g
- Fiber: 1g
- Protein: 3g
- Cholesterol: 30mg
These scones are a great way to enjoy a seasonal treat without going overboard. So, go ahead and indulge a little—you deserve it!
Serving Suggestions
Now that you’ve baked up a batch of those delightful *Pumpkin Scones October — Classic*, let’s talk about how to elevate your dining experience even further! Pairing these scones with the right accompaniments can take them from delicious to absolutely divine.
First off, a warm pat of butter is always a classic choice. There’s something about that creamy richness melting into the fluffy scones that just feels like a warm hug on a chilly fall day. You could also try a smear of pumpkin butter or apple butter for a little extra flavor kick. Yum!
If you’re feeling a bit fancy, serve your scones with a dollop of whipped cream or a drizzle of maple syrup. Trust me, it’s a match made in heaven! You could even sprinkle a bit of cinnamon on top for that extra touch of autumn.
And let’s not forget about beverages! These scones pair beautifully with a steaming cup of spiced chai or a rich, bold coffee. A spiced apple cider or even a cozy hot chocolate can also make for a delightful pairing, especially when you’re enjoying them on a crisp afternoon.
For a festive touch, consider serving these scones alongside a cheese board featuring creamy brie or sharp cheddar. The combination of flavors will blow your mind! Honestly, there are so many possibilities, so don’t be afraid to mix and match your favorites.
So, gather your loved ones, brew that perfect cup of something warm, and enjoy your pumpkin scones in style. I promise, they’ll be a hit every time!
Storage & Reheating Instructions
Now that you’ve whipped up these scrumptious *Pumpkin Scones October — Classic*, you might be wondering how to keep them fresh for later. Don’t worry—storing these delightful treats is super easy!
To store your leftover scones, simply place them in an airtight container. I like to layer parchment paper between the scones to prevent them from sticking together. They’ll stay fresh at room temperature for a couple of days, but if you want to keep them longer, pop them in the fridge. Just remember to let them come to room temperature before indulging!
If you’ve got more scones than you can handle, consider freezing them! Wrap each scone individually in plastic wrap, then place them in a freezer-safe bag or container. They can last up to 2-3 months in the freezer. When you’re ready to enjoy, just take one out and let it thaw at room temperature for a bit.
Now, let’s talk reheating! The best way to bring back that freshly baked goodness is by popping them in the oven. Preheat your oven to 350°F (175°C) and place the scones on a baking sheet. Heat them for about 5-10 minutes until they’re warm and slightly crisp on the outside. If you’re in a hurry, a quick 20-30 seconds in the microwave will do the trick, but I recommend using the oven if you can—it really helps retain that lovely texture!
With these simple storage and reheating tips, you can enjoy your pumpkin scones any time you crave a little taste of fall! Happy baking!
Share Your Experience
I would absolutely love to hear how your *Pumpkin Scones October — Classic* turned out! Did you make any fun twists on the recipe? Maybe you added chocolate chips or a sprinkle of nuts? Whatever your experience, sharing it can inspire others to get creative in their kitchens too!
Feel free to drop a comment below and let me know how these delightful scones filled your home with the warm aromas of fall. Did they bring back any special memories? Or maybe you created some new ones with loved ones while baking together? I can’t wait to read all about it!
And if you snapped some photos of your scones, please share them! I’d love to see your beautiful creations. Remember, there’s no right or wrong way to enjoy these scones—each batch is a little piece of autumn magic!
Happy baking, and I look forward to hearing from you!
Print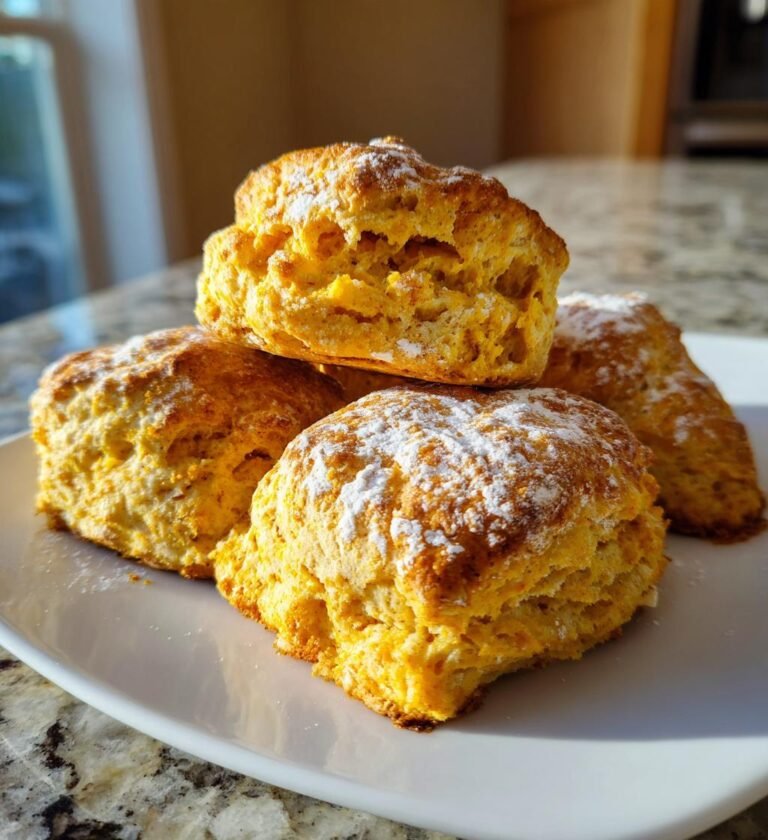
Pumpkin Scones October — Classic: 5 Reasons to Love Them
Delicious pumpkin scones perfect for fall.
- Total Time: 35 minutes
- Yield: 8 scones 1x
Ingredients
- 2 cups all-purpose flour
- 1/2 cup sugar
- 1 tablespoon baking powder
- 1/2 teaspoon salt
- 1 teaspoon cinnamon
- 1/2 teaspoon nutmeg
- 1/2 cup cold butter, cubed
- 1/2 cup pumpkin puree
- 1/4 cup milk
- 1 egg
- 1 teaspoon vanilla extract
Instructions
- Preheat the oven to 400°F (200°C).
- In a bowl, mix flour, sugar, baking powder, salt, cinnamon, and nutmeg.
- Add cold butter and mix until crumbly.
- In another bowl, combine pumpkin puree, milk, egg, and vanilla.
- Mix wet ingredients into dry ingredients until just combined.
- Turn the dough onto a floured surface and shape into a circle.
- Cut into wedges and place on a baking sheet.
- Bake for 15-20 minutes until golden brown.
Notes
- Serve warm with butter.
- Store leftovers in an airtight container.
- Add chocolate chips for extra flavor.
- Prep Time: 15 minutes
- Cook Time: 20 minutes
- Category: Baked Goods
- Method: Baking
- Cuisine: American
- Diet: Vegetarian
Nutrition
- Serving Size: 1 scone
- Calories: 180
- Sugar: 8g
- Sodium: 200mg
- Fat: 8g
- Saturated Fat: 5g
- Unsaturated Fat: 2g
- Trans Fat: 0g
- Carbohydrates: 24g
- Fiber: 1g
- Protein: 3g
- Cholesterol: 30mg
Keywords: Pumpkin Scones, Fall Recipes, Baked Goods