
Halloween is just around the corner, and that means it’s time to get creative in the kitchen! I absolutely love this season—there’s something so thrilling about transforming ordinary recipes into spooky delights. One of my all-time favorites has to be *Halloween Deviled Eggs Classic*. These aren’t just your run-of-the-mill deviled eggs; they’re a wickedly fun twist on a beloved appetizer that’s sure to impress your friends and family at any Halloween gathering.
Picture this: a platter of eggs with a hauntingly delicious mix of bright yellow and eerie black filling, garnished with olive “eyes” staring up at you. It’s the perfect blend of flavor and fright! Plus, the best part? They’re super easy to whip up! Trust me, you’ll love how simple the ingredients are and how quickly you can prepare them. These deviled eggs are not just eye-catching—they’re rich and creamy, with a delightful kick from Dijon mustard that will have your guests coming back for more.
So, whether you’re hosting a Halloween party, looking for a fun snack for the kids, or just wanting to join in on the spooky spirit, these *Halloween Deviled Eggs Classic* are your go-to recipe. Let’s dive into the ingredients and get started on this frightfully delicious treat!
Ingredients List
To create these delightful *Halloween Deviled Eggs Classic*, you’ll need just a handful of simple ingredients that pack a punch in both flavor and fun! Here’s what you’ll need:
- 6 large eggs: The star of the show! Make sure they’re fresh for the best flavor.
- 1/4 cup mayonnaise: This adds creaminess to the yolk mixture. I prefer using a good quality mayo for an extra rich taste.
- 1 teaspoon Dijon mustard: A dash of zing! It complements the mayo perfectly and gives that classic deviled egg flavor.
- Salt to taste: Don’t forget to season! A pinch or two will enhance all the flavors beautifully.
- Black food coloring: This is where the magic happens! You’ll use this to create that spooky black filling that’s sure to impress.
- Olives for garnish: Slice them up to create little “eyes” on your eggs. They add a whimsical touch that’s perfect for Halloween!
Gather these ingredients, and you’ll be well on your way to making a spooky yet scrumptious appetizer that your guests won’t forget!
How to Prepare Halloween Deviled Eggs Classic
Now that you’ve gathered your ingredients, it’s time to bring these spooky *Halloween Deviled Eggs Classic* to life! The process is fun and straightforward, and I promise you’ll be amazed at how quickly they come together. Let’s dive right into the step-by-step instructions!
Step-by-Step Instructions
First things first, let’s hard boil those eggs. Place your six large eggs in a pot and cover them with cold water, making sure there’s about an inch of water above the eggs. Turn the heat to medium-high and bring it to a rolling boil. Once it’s boiling, cover the pot and remove it from the heat. Set a timer for 10-12 minutes, depending on how firm you like your yolks. I usually go for 12 minutes for a nice, classic texture.
When your timer goes off, carefully transfer the eggs to a bowl of ice water. This will stop the cooking process and make peeling them much easier. Let them chill for about 5-10 minutes until they’re cool to the touch.
Alright, now comes the fun part! Once the eggs are cool, gently tap them on a hard surface to crack the shell, then peel the eggs under running water for easy removal. Slice each egg in half lengthwise and pop those lovely yolks into a mixing bowl. Don’t worry if a few yolks crumble—it’s all going to taste delicious in the end!
Add the 1/4 cup of mayonnaise, 1 teaspoon of Dijon mustard, and a pinch of salt to the yolks. Mix everything together until it’s smooth and creamy. I love using a fork for this—it’s quick and gets the job done! Now, here’s where the magic happens: divide the yolk mixture into two bowls. In one bowl, add a few drops of black food coloring. Mix it well until you achieve that spooky black color. You can adjust the coloring based on how dark you want it—just remember, a little goes a long way!
Now, it’s time to fill those egg whites! Start with the yellow yolk mixture and fill half of the egg whites. Next, take the black yolk mixture and fill the other half. It’s like a Halloween masterpiece on a plate! To finish, garnish each egg with a slice of olive on top to create those adorable little “eyes.”
Finally, pop your platter of Halloween deviled eggs in the fridge and let them chill for about 15 minutes. This way, they’ll be nice and cool when it’s time to serve. And there you have it—your very own spooky and delicious *Halloween Deviled Eggs Classic*! Perfect for impressing guests or enjoying with the family.
Why You’ll Love This Recipe
There’s so much to adore about these *Halloween Deviled Eggs Classic*! Here are just a few reasons why they’re sure to become a favorite at your spooky celebrations:
- Quick Preparation: With just a 25-minute total time, you can whip these up in a flash, leaving more time for Halloween fun!
- Easy Ingredients: You probably already have these ingredients in your pantry, making this recipe as simple as it is delicious.
- Fun Presentation: The striking contrast of yellow and black, topped with whimsical olive “eyes,” creates a dish that’s as much a feast for the eyes as it is for the taste buds.
- Kid-Friendly: This spooky twist on a classic will get the kids excited about eating their veggies—who can resist a deviled egg with a creepy edge?
- Perfect for Any Gathering: Whether it’s a Halloween party, a potluck, or just a family dinner, these eggs are a delightful conversation starter!
Trust me, whipping up these *Halloween Deviled Eggs Classic* will have everyone raving—and you’ll love how easy it is!
Tips for Success
To ensure your *Halloween Deviled Eggs Classic* turn out perfectly every time, keep these handy tips in mind:
- Fresh Eggs: Older eggs can be harder to peel. If you can, use eggs that are about a week old for the best results.
- Ice Bath: Don’t skip the ice bath after boiling! This drastic temperature change helps loosen the shells, making peeling a breeze.
- Mixing Technique: When combining the yolks with mayo and mustard, be gentle. Overmixing can lead to a grainy texture instead of the smooth creaminess you want.
- Food Coloring: Start with just a drop or two of black food coloring, then gradually add more until you reach your desired shade. It’s easier to darken than to lighten!
- Chill Time: Allow your filled eggs to chill in the fridge for at least 15 minutes before serving. This not only helps the flavors meld but also makes them firmer and easier to handle.
With these tips, your spooky deviled eggs will be a hit at any Halloween gathering!
Nutritional Information Section
When it comes to our delicious *Halloween Deviled Eggs Classic*, it’s great to know what you’re munching on! Here’s an estimated breakdown of the nutritional values per serving, which is one egg half:
- Calories: 70
- Fat: 6g
- Saturated Fat: 1g
- Unsaturated Fat: 5g
- Trans Fat: 0g
- Cholesterol: 186mg
- Sodium: 100mg
- Carbohydrates: 1g
- Fiber: 0g
- Protein: 3g
- Sugar: 0g
Keep in mind that these values are estimates and can vary based on the specific ingredients you use. Enjoying these spooky treats can be a guilt-free pleasure during your Halloween festivities!
FAQ Section
Got questions about making these spooky *Halloween Deviled Eggs Classic*? Don’t worry, I’ve got you covered! Here are some common queries and answers to help you out:
Q1. Can I make these deviled eggs ahead of time?
Absolutely! You can prepare the deviled eggs a day in advance. Just fill the egg whites and store them in the fridge covered tightly. Add the olive “eyes” right before serving for the best presentation.
Q2. What can I use instead of black food coloring?
If you prefer, you can use natural alternatives like activated charcoal or even a mix of cocoa powder with a little water to create a dark paste. Just keep in mind that the flavor might change slightly.
Q3. How do I store leftovers?
Store any leftover *Halloween Deviled Eggs Classic* in an airtight container in the fridge. They should stay fresh for about 2-3 days. Just be aware that they might lose a bit of their spookiness in appearance!
Q4. Can I use other toppings instead of olives?
Definitely! Get creative! You could use sliced cherry tomatoes for a bloodshot eye effect or even small pieces of red bell pepper for an extra pop of color. The possibilities are endless!
Q5. Are these deviled eggs suitable for vegetarians?
Yes! These *Halloween Deviled Eggs Classic* are vegetarian-friendly. They’re perfect for any party, ensuring everyone can enjoy this spooky treat!
Serving Suggestions
Now that you’ve whipped up these delightful *Halloween Deviled Eggs Classic*, it’s time to think about how to elevate your spooky spread! Here are some fun ideas to serve alongside your deviled eggs that’ll enhance the overall meal experience:
- Crispy Veggie Platter: Pair your deviled eggs with a colorful assortment of fresh veggies like carrots, cucumbers, and bell peppers. Add a spooky dip, like a black bean hummus, for that extra Halloween flair!
- Cheesy Spider Crackers: Serve up some crunchy crackers topped with cheese and shaped like spiders. Just use sliced olives for the eyes and legs—your guests will love the creativity!
- Witch’s Brew Punch: Mix up a fun Halloween-themed drink, like a green punch with floating gummy worms. It’ll be a hit with kids and adults alike, making your gathering all the more festive.
- Mini Sandwiches: Create some spooky mini sandwiches using cookie cutters to shape them into ghosts, bats, or pumpkins. Fill them with classic favorites like turkey and cheese or hummus and veggies.
With these serving suggestions, your *Halloween Deviled Eggs Classic* will shine as the star of a wonderfully spooky spread that everyone will enjoy!
Print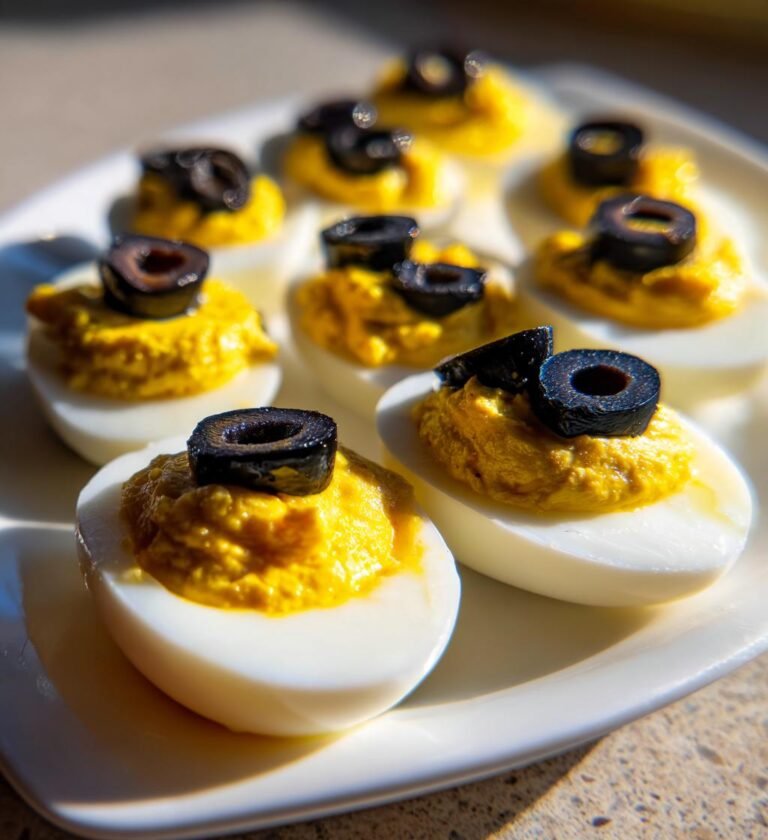
Halloween Deviled Eggs Classic That Will Thrill Your Guests
Halloween themed deviled eggs with a spooky twist.
- Total Time: 25 minutes
- Yield: 12 deviled eggs 1x
Ingredients
- 6 large eggs
- 1/4 cup mayonnaise
- 1 teaspoon Dijon mustard
- Salt to taste
- Black food coloring
- Olives for garnish
Instructions
- Hard boil the eggs and let them cool.
- Peel the eggs and cut them in half lengthwise.
- Remove the yolks and place them in a bowl.
- Add mayonnaise, mustard, and salt to the yolks and mix until smooth.
- Divide the yolk mixture into two bowls.
- To one bowl, add black food coloring and mix well.
- Fill half of the egg whites with the yellow yolk mixture.
- Fill the other half with the black yolk mixture.
- Garnish with sliced olives to create a spooky eye effect.
- Chill before serving.
Notes
- Adjust the amount of black food coloring for desired darkness.
- Use different toppings for decoration.
- Prep Time: 15 minutes
- Cook Time: 10 minutes
- Category: Appetizer
- Method: Boiling and mixing
- Cuisine: American
- Diet: Vegetarian
Nutrition
- Serving Size: 1 egg half
- Calories: 70
- Sugar: 0g
- Sodium: 100mg
- Fat: 6g
- Saturated Fat: 1g
- Unsaturated Fat: 5g
- Trans Fat: 0g
- Carbohydrates: 1g
- Fiber: 0g
- Protein: 3g
- Cholesterol: 186mg
Keywords: Halloween, Deviled Eggs, Appetizer