
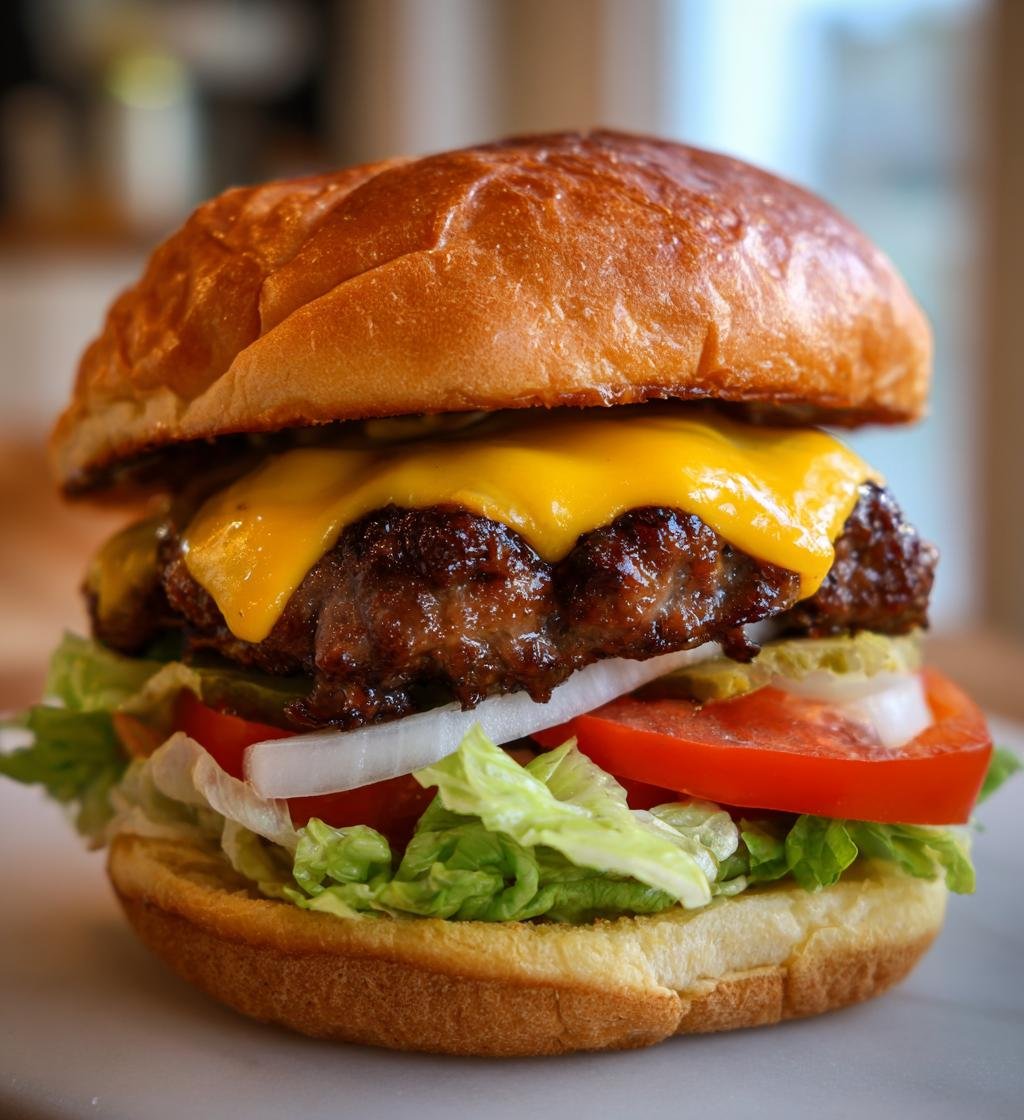
Ah, summer! The sun is shining, and there’s just something magical about the sizzle of burgers on the grill, isn’t there? When I think of backyard barbecues, nothing beats the joy of biting into a juicy, homemade cheeseburger. Seriously, it’s one of life’s simplest pleasures! This recipe for *Cheeseburgers July — Homemade* is my go-to for those warm evenings when you want something delicious and satisfying without breaking a sweat in the kitchen.
Imagine the aroma of seasoned beef wafting through the air, the sound of cheese melting to perfection, and the crunch of fresh veggies piled high. You’ll want to invite friends over just to share these beauties! Trust me, once you whip up these cheeseburgers, you’ll never want to settle for takeout again.
Let’s dive into the ingredients and get you ready to grill up the best cheeseburgers of your life!
Ingredients for Cheeseburgers July — Homemade
Gathering the right ingredients is the first step to crafting your homemade cheeseburgers, and it couldn’t be easier! Here’s what you’ll need:
- 1 lb ground beef: Choose a blend with some fat for extra juiciness. I like using 80/20 for the perfect balance!
- 4 slices of cheddar cheese: Sharp or mild, it’s your choice! Melted cheese is what makes a cheeseburger truly special.
- 4 hamburger buns: Go for soft, fresh buns that can cradle all the goodness. Brioche or sesame seed buns are my personal favorites!
- 1 tablespoon mustard: Adds a tangy kick! Use your favorite kind, whether it’s yellow, Dijon, or spicy brown.
- 1 tablespoon ketchup: Classic choice for that sweet and tangy flavor. Feel free to adjust according to your taste!
- 1 teaspoon salt: Essential for enhancing the beef’s flavor.
- 1 teaspoon pepper: Freshly ground is best for that perfect seasoning.
- Lettuce leaves: Crisp and refreshing! Iceberg or romaine works well.
- Tomato slices: Juicy and ripe, they add a burst of flavor to each bite.
- Onion slices: Whether you prefer raw red onions for a sharp bite or caramelized for sweetness, they’re a must!
With these ingredients, you’re well on your way to burger perfection! Get ready to fire up that grill and let the flavor explosion begin!
How to Prepare Cheeseburgers July — Homemade
Now that we’ve gathered our ingredients, it’s time to dive into the fun part: preparing those mouthwatering cheeseburgers! Follow these easy steps, and you’ll be grilling like a pro in no time.
Prepping the Grill
First things first, let’s get that grill fired up! Preheat your grill to medium-high heat, which is usually around 375°F to 400°F. This temperature ensures a nice sear on your patties. If you’re using a charcoal grill, wait until the coals are covered in white ash before cooking. You want to hear that satisfying sizzle when the meat hits the grill!
Don’t forget to brush the grates with a bit of oil to prevent sticking. Just grab a paper towel, dip it in vegetable oil, and use tongs to wipe down the grates. You’ll thank me later when your burgers slide right off!
Mixing the Ingredients
In a large bowl, combine your ground beef with salt and pepper. Use your hands to gently mix it all together—don’t overdo it, or your patties might end up tough. Once everything is well combined, divide the mixture into four equal portions and shape them into patties. Aim for about three-quarters of an inch thick, as they’ll shrink while grilling.
Make a slight indent in the center of each patty with your thumb; this helps them cook evenly and prevents that dreaded puffing up. Trust me, this little trick is a game-changer!
Grilling the Patties
Place the patties on the grill and let them cook undisturbed for about 4-5 minutes on the first side. Resist the urge to press down on them; you want all those delicious juices to stay inside!
After 4-5 minutes, flip the patties and cook for another 4-5 minutes for medium doneness. If you like your burgers a bit more well-done, just add an extra minute or two. About a minute before they’re done, place a slice of cheddar cheese on each patty. Close the grill lid to let that cheese melt into gooey perfection!
Toasting the Buns
While your patties are grilling, it’s the perfect time to toast your hamburger buns. Just a minute or two on the grill will do the trick! Keep an eye on them, as they can go from toasty to burnt in a flash. You want them golden brown, with just a hint of crispness to hold all that juicy goodness!
Assembling the Burgers
Now comes the best part: assembling your burgers! Start with the bottom half of your toasted bun. Spread a generous layer of mustard and ketchup for that classic combo, then add your grilled patty with melted cheese. Next, layer on the lettuce, tomato slices, and onion slices. Don’t be shy—pile them high!
Finally, cap it off with the top half of the bun. Give it a gentle press to hold everything together, and voila! You’ve got yourself a homemade cheeseburger that’s ready to be devoured. Serve immediately and enjoy every delicious bite!
Tips for Success
Now that you’re all set to make those fabulous cheeseburgers, let me share some pro tips to ensure you nail it every time! Trust me, these little insights can make a big difference in your burger game.
Choose the Right Beef Blend
For the juiciest burgers, I recommend using ground beef that’s 80% lean and 20% fat. This blend gives you a deliciously rich flavor and keeps your patties moist. If you go too lean, you might end up with dry burgers, and nobody wants that!
Don’t Skip the Seasoning
A sprinkle of salt and pepper is just the beginning! Feel free to get creative with seasonings. A dash of garlic powder or a splash of Worcestershire sauce mixed into the beef can elevate your burgers to gourmet status. Just remember to season right before grilling to keep those flavors locked in!
Perfect Cooking Times
Cooking times can vary based on your grill and the thickness of your patties. Generally, aim for 4-5 minutes on each side for medium doneness, but use a meat thermometer if you want to be precise. Aim for about 160°F for a perfectly cooked burger. Just don’t overcook them, or you’ll lose all those delightful juices!
Let Them Rest
Once your burgers are off the grill, let them rest for a couple of minutes before serving. This allows the juices to redistribute, making each bite even more flavorful and juicy. It’s worth the wait, I promise!
Experiment with Toppings
This is your chance to get creative! While I love the classic combo of lettuce, tomato, and onion, don’t hesitate to experiment with toppings. Think crispy bacon, avocado slices, or even a fried egg on top! Different cheeses like blue cheese or pepper jack can also bring unique flavors to your burgers.
With these tips, you’ll be well on your way to becoming a cheeseburger aficionado! So fire up that grill, and get ready to impress your family and friends with your homemade creations. Happy grilling!
Variations on Cheeseburgers July — Homemade
Now that you’ve mastered the classic homemade cheeseburger, let’s shake things up a bit! There are so many delicious ways to customize your burgers and take them to the next level. Here are some of my favorite variations to inspire your summer grilling adventures:
BBQ Bacon Cheeseburger
For a smoky, sweet twist, slather your patty with BBQ sauce and top it with crispy bacon. Add some sharp cheddar and a few onion rings for that extra crunch. Wow, talk about a flavor explosion!
Mushroom Swiss Delight
If you’re a fan of earthy flavors, sauté some mushrooms in butter and garlic until they’re golden brown, then pile them on top of your cheeseburger with a slice of Swiss cheese. The combination is just divine!
Spicy Jalapeño Burger
Crank up the heat by adding sliced jalapeños or even some spicy pepper jack cheese. A dollop of spicy mayo or chipotle sauce takes this burger to fiery new heights. Perfect for those who love a kick!
Caprese Burger
For a fresh twist, try a Caprese-inspired burger! Top your patty with fresh mozzarella, sliced tomatoes, and a drizzle of balsamic glaze. Add a few basil leaves for that classic Italian flavor. It’s light, refreshing, and oh-so-tasty!
Greek-Inspired Burger
Switch things up with a Greek flair! Mix some chopped olives and feta cheese into your ground beef before forming patties. Top with tzatziki sauce, cucumber slices, and lettuce for a Mediterranean feast.
Breakfast Burger
Why not enjoy breakfast on a bun? Top your cheeseburger with a fried egg, crispy hash browns, and a slice of cheddar. It’s the ultimate brunch treat that’ll have everyone raving!
Feel free to mix and match your favorite toppings and sauces, too! The beauty of homemade cheeseburgers is that they can be as simple or as extravagant as you like. So, get creative and have fun experimenting with these variations at your next summer gathering! Your taste buds will thank you!
Nutritional Information
Here’s a quick look at the nutritional information for one of these mouthwatering cheeseburgers:
- Calories: 400
- Sugar: 5g
- Sodium: 800mg
- Fat: 25g
- Saturated Fat: 10g
- Unsaturated Fat: 12g
- Trans Fat: 0g
- Carbohydrates: 30g
- Fiber: 1g
- Protein: 25g
- Cholesterol: 70mg
Please keep in mind that nutritional values can vary based on the specific ingredients and brands you use. It’s always a good idea to check the labels for the most accurate information. Enjoy your homemade cheeseburgers guilt-free, knowing you’re treating yourself to something delicious!
FAQ Section
Q1. Can I use turkey or chicken instead of beef for my cheeseburgers?
Absolutely! Turkey and chicken can make delicious cheeseburgers as well. Just keep in mind that you may need to adjust the cooking times, as leaner meats can dry out more quickly. I recommend adding a bit of olive oil or some grated cheese into the mixture to keep them juicy!
Q2. What’s the best way to store leftover cheeseburgers?
If you find yourself with leftover cheeseburgers (which is rare but can happen!), let them cool completely, then wrap them tightly in plastic wrap or foil. Store them in the fridge for up to three days. You can reheat them in the microwave or back on the grill for a few minutes to bring back that delicious flavor!
Q3. How can I ensure my cheeseburgers are cooked to the right doneness?
Using a meat thermometer is the best way to check! For medium doneness, aim for about 160°F. Remember, the burgers will continue to cook a little while resting off the grill, so don’t be afraid to take them off just before they reach the perfect temperature.
Q4. Can I prepare the patties ahead of time?
Definitely! You can mix and shape your patties ahead of time. Just cover them tightly with plastic wrap or place them in an airtight container in the fridge for up to 24 hours. If you want to prep even further in advance, you can freeze them! Just make sure to separate each patty with parchment paper to prevent them from sticking together.
Q5. What are some great sides to serve with cheeseburgers?
Oh, the possibilities are endless! Classic sides include crispy fries or onion rings, but you can also go for a fresh salad or coleslaw to balance out the meal. Grilled veggies or corn on the cob are fantastic summer options, too. Whatever you choose, just make sure it pairs well with that juicy cheeseburger flavor!
Why You’ll Love This Recipe
- Quick Preparation: With just 25 minutes from start to finish, you can whip up a delicious meal in no time—perfect for those busy summer evenings!
- Incredible Flavor: The combination of juicy beef, melted cheese, and fresh toppings creates a flavor explosion that will have everyone coming back for seconds.
- Customizable: You can easily mix and match toppings and sauces to suit your taste, making each burger uniquely yours!
- Perfect for Gatherings: Whether it’s a backyard barbecue or a casual dinner with friends, these cheeseburgers are sure to impress and satisfy a crowd.
- Homemade Goodness: There’s something special about making your own burgers—fresh ingredients and no mystery additives mean you’ll know exactly what you’re serving!
- Kid-Friendly: Kids love cheeseburgers! Get the little ones involved in the assembly, and watch them enjoy their creations.
Cheeseburgers July — Homemade: 5 Steps to Flavor Bliss
Delicious homemade cheeseburgers perfect for summer.
- Total Time: 25 minutes
- Yield: 4 servings 1x
Ingredients
- 1 lb ground beef
- 4 slices of cheddar cheese
- 4 hamburger buns
- 1 tablespoon mustard
- 1 tablespoon ketchup
- 1 teaspoon salt
- 1 teaspoon pepper
- Lettuce leaves
- Tomato slices
- Onion slices
Instructions
- Preheat the grill to medium-high heat.
- In a bowl, mix ground beef with salt and pepper.
- Shape the mixture into 4 patties.
- Grill the patties for about 4-5 minutes on each side.
- Place a slice of cheese on each patty during the last minute of cooking.
- Toast the hamburger buns on the grill.
- Assemble the burgers with mustard, ketchup, lettuce, tomato, and onion.
- Serve hot.
Notes
- Use lean ground beef for a healthier option.
- Add your favorite toppings like pickles or bacon.
- Adjust cooking time for desired doneness.
- Prep Time: 10 minutes
- Cook Time: 15 minutes
- Category: Main Dish
- Method: Grilling
- Cuisine: American
- Diet: Gluten Free
Nutrition
- Serving Size: 1 burger
- Calories: 400
- Sugar: 5g
- Sodium: 800mg
- Fat: 25g
- Saturated Fat: 10g
- Unsaturated Fat: 12g
- Trans Fat: 0g
- Carbohydrates: 30g
- Fiber: 1g
- Protein: 25g
- Cholesterol: 70mg
Keywords: Cheeseburgers, Homemade, Summer