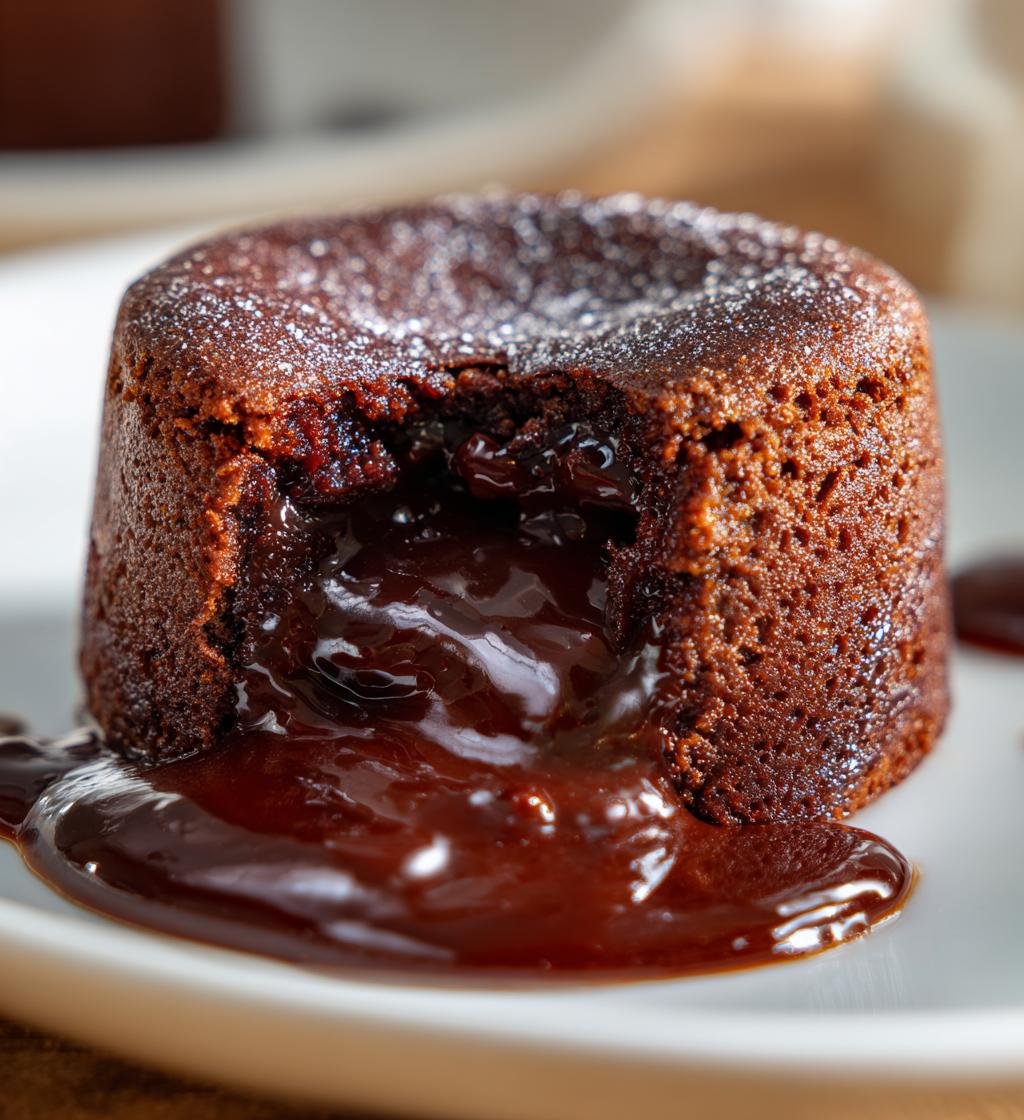
Oh, let me tell you about the absolute magic of Chocolate Lava Cakes! These little beauties are like a warm hug in dessert form, bursting with rich molten chocolate that flows out once you dig in. I first discovered these decadent treats during a romantic dinner date, and ever since, they’ve become my go-to dessert for impressing friends and family. There’s just something about that gooey center that makes every bite feel like a celebration!
Whether it’s a birthday dinner, a cozy date night, or just a sweet weekend indulgence, Chocolate Lava Cakes never fail to steal the show. I love how they look so elegant, yet they’re surprisingly easy to whip up in just about 15 minutes of prep time. Trust me, your loved ones will be raving about these cakes long after the last crumb has been devoured. So, let’s dive into how to create this dessert wonder that’s sure to make any occasion feel extra special!
Ingredients for Chocolate Lava Cakes
To create the most divine Chocolate Lava Cakes, you’ll need just a handful of simple yet rich ingredients. Here’s what you’ll gather:
- 1 cup dark chocolate, chopped: Choose a high-quality chocolate for the best flavor – I love using 70% cocoa for that perfect balance of sweetness and richness.
- 1/2 cup unsalted butter: Make sure it’s at room temperature to blend effortlessly with the chocolate.
- 1 cup powdered sugar: This adds sweetness and helps create that lovely smooth texture.
- 2 large eggs: They provide structure and richness; fresh eggs work wonders in this recipe!
- 2 large egg yolks: Extra richness from the yolks is key for that luscious molten center.
- 1 teaspoon vanilla extract: A splash of vanilla elevates the chocolate flavor to new heights.
- 1/2 cup all-purpose flour: Just enough to give the cakes their structure without overpowering the gooeyness.
- 1/4 teaspoon salt: A pinch of salt enhances all those sweet and chocolatey flavors beautifully.
Gather these ingredients and let’s get ready to bake up a storm of deliciousness!
How to Prepare Chocolate Lava Cakes
Get ready to whip up these Chocolate Lava Cakes with ease! Follow these steps, and I promise you’ll have your friends and family swooning over your baking skills in no time.
- Preheat your oven: Start by preheating your oven to 425°F (220°C). This step is crucial because a hot oven helps create that perfect gooey center!
- Prepare your ramekins: Grease four ramekins generously with unsalted butter. Then, dust them lightly with flour. This will ensure your cakes slide out easily when it’s time to serve.
- Melt the chocolate and butter: In a heatproof bowl, combine the chopped dark chocolate and unsalted butter. Place the bowl over a pot of simmering water, stirring occasionally until everything is melted and smooth. Wow, the aroma will be divine!
- Add powdered sugar: Once the chocolate and butter are perfectly melted, stir in the powdered sugar until the mixture is glossy and smooth. Don’t rush this step; it’s where the magic starts!
- Incorporate the eggs: Now, crack in those two large eggs and two egg yolks, followed by the vanilla extract. Mix everything together until it’s well combined. You want that rich, velvety texture!
- Fold in the dry ingredients: Gently fold in the all-purpose flour and salt until just combined. Be careful not to overmix; a few flour streaks are okay! This keeps your cakes light and airy.
- Fill the ramekins: Pour the luscious batter into the prepared ramekins, filling them about three-quarters full. You want enough room for that delicious molten center to form!
- Bake to perfection: Place the ramekins on a baking sheet and pop them into the preheated oven. Bake for 12-14 minutes, just until the edges are set but the centers are still soft. Keep an eye on them; overbaking is the enemy of gooeyness!
- Cool and serve: Once baked, let the cakes cool in the ramekins for about 1 minute. Then, carefully invert each ramekin onto a plate. Give it a little shake to release the cake, and voilà! They should come out beautifully.
Now, they’re ready to be devoured! Just remember, serving them immediately is key for that glorious molten center. Enjoy every oozy bite!
Why You’ll Love This Recipe
- Quick Preparation: With just 15 minutes of prep time, you can have these decadent Chocolate Lava Cakes ready to bake! They’re perfect for when you need a sweet treat in a hurry.
- Easy to Make: Don’t worry if you’re not a baking pro! The steps are simple and straightforward, making it a breeze for anyone to create this delicious dessert.
- Delicious Gooey Center: The highlight of these cakes is that ooey-gooey chocolate center that flows out with each bite. It’s pure chocolate bliss!
- Perfect for Special Occasions: Whether it’s a birthday, anniversary, or any celebration, these cakes are sure to impress your guests and make the occasion feel even more special.
- Pairs Well with Ice Cream: The warm molten chocolate is heavenly when served alongside a scoop of vanilla ice cream. Trust me, it’s a match made in dessert heaven!
Tips for Success with Chocolate Lava Cakes
Alright, let’s talk about how to ensure your Chocolate Lava Cakes turn out perfectly every single time! With just a few pro tips, you’ll achieve that dreamy molten center and the right texture that will have everyone begging for seconds.
Choose Quality Ingredients
First and foremost, the quality of your chocolate makes a world of difference. Go for a dark chocolate that you love to eat on its own – I swear by a good 70% cocoa for that deep, rich flavor. And don’t forget about the butter! Unsalted, high-quality butter is essential for that luscious texture.
Watch the Baking Time
Baking time is critical here! Keep an eye on your cakes as they bake. You want the edges to be set while the center remains soft and gooey. Set a timer for 12 minutes and check them. If they’re still too jiggly, give them another minute or two, but be careful not to overbake – that’s the quickest way to lose that glorious molten center!
Cool Them Just Right
After baking, let them cool in the ramekins for about 1 minute. This is super important because it helps the cakes firm up just enough to hold their shape when you flip them out. If you let them cool too long, the center may solidify, and we definitely don’t want that!
Don’t Skip the Greasing and Dusting
Greasing and dusting your ramekins with flour is a must! It ensures that your cakes slide out easily. I can’t tell you how many times I’ve had a beautiful cake stick to the sides, leading to a sad, broken dessert. Avoid that heartbreak by taking this extra step!
Practice Makes Perfect
If you’re making these for a special occasion, I recommend doing a practice run first. It’ll help you get comfortable with the baking times and ensure you nail that gooey center – plus, who wouldn’t want an extra Chocolate Lava Cake to enjoy?
Follow these tips, and you’ll be well on your way to making Chocolate Lava Cakes that impress every time! Happy baking!
Variations on Chocolate Lava Cakes
Now that you’ve mastered the classic Chocolate Lava Cake, let’s have some fun with variations that will keep things exciting in the kitchen! There’s a whole world of flavors and ingredients you can explore to make these little delights even more special.
Different Types of Chocolate
First up, consider swapping out the dark chocolate for other types! Milk chocolate will give you a sweeter, creamier cake, while a rich white chocolate will create a luxurious treat. I’ve even played around with flavored chocolates, like hazelnut or orange-infused, which add a delightful twist to the traditional recipe. Just remember, the chocolate you choose will greatly impact the overall flavor, so pick one that makes your taste buds dance!
Flavor Infusions
If you want to get a little adventurous, infuse your batter with unique flavors! A splash of espresso or coffee can elevate the chocolate, giving it a deep, rich dimension. Or how about a hint of peppermint extract for a festive touch? Just a few drops can transform your lava cakes into a holiday masterpiece. For something fruity, try adding a tablespoon of raspberry or cherry puree to the batter for a pop of flavor that pairs beautifully with chocolate!
Incorporating Fruit
Speaking of fruit, why not sneak some into your lava cakes? You can fold in some chopped fresh strawberries or blueberries for a burst of freshness! Another fun idea is to place a few pieces of your favorite fruit right in the center of the cake before baking. The molten chocolate will mix with the fruit as it bakes, creating a deliciously gooey surprise when you dig in.
Nuts and Other Add-ins
For those who like a little crunch, consider adding chopped nuts like walnuts or pecans to the batter. They not only add texture but also a lovely nutty flavor that complements the chocolate. You could also sprinkle a bit of sea salt on top before serving to enhance the sweetness and create a delightful contrast.
With these variations, you can turn the classic Chocolate Lava Cake into a dessert that’s uniquely yours! Don’t be afraid to experiment and let your creativity shine. Each twist can bring new flavors to the table, making every bite a delightful surprise!
Serving Suggestions for Chocolate Lava Cakes
Ah, the moment of truth! Now that you’ve got those gorgeous Chocolate Lava Cakes ready to serve, let’s talk about how to present them beautifully and what to pair them with for an unforgettable dessert experience!
First off, I can’t recommend enough serving these warm cakes with a generous scoop of vanilla ice cream. The contrast between the hot, gooey chocolate and the cold, creamy ice cream is pure magic. It’s like a warm hug for your taste buds! If you want to take it a step further, drizzle a bit of chocolate sauce or caramel sauce over the top for that extra touch of indulgence.
Fresh berries are another fabulous addition! I love using raspberries or strawberries for their bright color and tartness, which cuts through the richness of the chocolate. Simply scatter a handful around the plate for a pop of color and freshness. You could even make a simple berry compote by gently cooking them down with a bit of sugar – it adds a delightful fruity contrast that complements the chocolate perfectly!
For a touch of elegance, consider dusting the top of your cakes with some powdered sugar right before serving. It gives a lovely snowy effect that makes the dessert look fancy without any fuss. And if you’re feeling extra adventurous, a sprinkle of sea salt on top can enhance the flavors beautifully, creating a wonderful balance between sweet and savory.
Presentation is key, so think about using a nice plate or even a rustic wooden board to serve your cakes. A beautiful presentation not only elevates the dessert but also shows your guests just how much you care. Trust me, they’ll be snapping photos before they even take a bite! So, gather your toppings, get creative, and enjoy every delicious moment of serving your Chocolate Lava Cakes!
Storage & Reheating Instructions
So, you’ve made these irresistible Chocolate Lava Cakes and somehow have some leftovers? First of all, good for you! But let’s make sure they stay just as delicious for your next indulgence.
To store your cakes, let them cool completely in the ramekins before transferring them to the refrigerator. Cover each ramekin tightly with plastic wrap or aluminum foil to prevent them from drying out or absorbing any fridge odors. They can be stored this way for up to 3 days. Just remember, the longer they sit, the less gooey they might become, but they’ll still be tasty!
When you’re ready to enjoy them again, it’s time to reheat! Preheat your oven to 350°F (175°C). Place the ramekins on a baking sheet for easy handling and heat them in the oven for about 8-10 minutes. This gentle reheating will help restore that warm, molten center. You’ll want to keep an eye on them—overheating can turn that glorious goo into a solid chocolate cake, and we definitely don’t want that!
If you’re in a hurry, you can use the microwave too! Pop a ramekin in the microwave for about 30 seconds on medium power. Check it and give it another 10-15 seconds if needed. Just be cautious – you want to warm them up without cooking them further.
And there you have it! Whether you opt for the oven or microwave, you’ll be ready to dive back into that chocolatey goodness in no time. Enjoy every luscious bite, just like the first time around!
Nutritional Information for Chocolate Lava Cakes
Now, let’s chat about the nutritional side of these delectable Chocolate Lava Cakes! While they’re undeniably rich and indulgent, it’s always good to know what you’re treating yourself to. Here’s a rough estimate of the nutritional values for one Chocolate Lava Cake:
- Calories: Approximately 350
- Fat: 20g
- Saturated Fat: 12g
- Unsaturated Fat: 8g
- Trans Fat: 0g
- Cholesterol: 90mg
- Sodium: 150mg
- Carbohydrates: 40g
- Fiber: 2g
- Sugar: 30g
- Protein: 5g
Keep in mind that these values are estimates and can vary based on the specific ingredients you use, like the type of chocolate or butter. So, if you’re counting macros or calories, be sure to adjust according to your chosen ingredients. But hey, a little indulgence now and then is totally worth it for a slice of chocolate heaven, right?
FAQ Section
Got questions about Chocolate Lava Cakes? Don’t worry, I’ve got you covered! Here are some common queries I hear and their answers to help you nail this dessert every time.
How can I tell when the Chocolate Lava Cakes are done?
The best way to check for doneness is to look at the edges. They should be set while the center still has a slight jiggle when you gently shake the ramekin. If it looks too liquidy, give it another minute in the oven. Remember, we want that gooey center, so don’t overbake!
Can I make Chocolate Lava Cakes ahead of time?
Absolutely! You can prepare the batter ahead of time and store it in the fridge for up to 24 hours. Just make sure to cover the ramekins tightly. When you’re ready to bake, take them out of the fridge and let them sit at room temperature for about 15-20 minutes before popping them in the oven. This helps them bake evenly!
What if my oven runs hot or cool?
Oven temperatures can definitely vary, so it’s good to be aware of how your oven behaves. If you know it runs hot, consider reducing the temperature by 25°F (about 10°C) and keep an eye on the baking time. Conversely, if it runs cooler, you may need to add a minute or two to ensure the cakes set properly. Investing in an oven thermometer can really help you get consistent results!
Can I use different types of chocolate?
Yes, you can experiment with different chocolates! Just keep in mind that milk chocolate will make the cakes sweeter, while white chocolate adds a creamy richness. Each type will give your cakes a unique flavor, so feel free to get creative!
What should I do if my cakes stick to the ramekins?
To avoid sticking, make sure you grease your ramekins well with butter and dust with flour. If they do stick, run a small knife around the edges to loosen them before inverting. But don’t worry too much; even if they don’t come out perfectly, they’ll still taste amazing!
Hopefully, these FAQs help you feel more confident when making your Chocolate Lava Cakes! If you have any more questions, just drop me a note. Happy baking!
Print
Chocolate Lava Cakes: 5 Steps to Divine Dessert Bliss
Delicious molten chocolate cakes with a gooey center.
- Total Time: 28 minutes
- Yield: 4 servings 1x
Ingredients
- 1 cup dark chocolate, chopped
- 1/2 cup unsalted butter
- 1 cup powdered sugar
- 2 large eggs
- 2 large egg yolks
- 1 teaspoon vanilla extract
- 1/2 cup all-purpose flour
- 1/4 teaspoon salt
Instructions
- Preheat your oven to 425°F (220°C).
- Grease four ramekins with butter and dust with flour.
- Melt chocolate and butter in a bowl over simmering water.
- Stir in powdered sugar until smooth.
- Add eggs, egg yolks, and vanilla; mix well.
- Fold in flour and salt until combined.
- Pour batter into prepared ramekins.
- Bake for 12-14 minutes until edges are firm.
- Let cool for 1 minute, then invert onto plates.
Notes
- Serve immediately for best results.
- Pair with vanilla ice cream.
- Store leftovers in the refrigerator.
- Prep Time: 15 minutes
- Cook Time: 13 minutes
- Category: Dessert
- Method: Baking
- Cuisine: American
- Diet: Vegetarian
Nutrition
- Serving Size: 1 cake
- Calories: 350
- Sugar: 30g
- Sodium: 150mg
- Fat: 20g
- Saturated Fat: 12g
- Unsaturated Fat: 8g
- Trans Fat: 0g
- Carbohydrates: 40g
- Fiber: 2g
- Protein: 5g
- Cholesterol: 90mg
Keywords: Chocolate Lava Cakes, dessert, molten chocolate, baking